Friday, August 16, 2013

Crafting a Nest for My Little Birdie

Wow!  It's been a long time since I've visited the ole blog!  2013 has been an incredible year with lots of changes for our family starting on January 4th with the birth of our new baby girl, Cora!  What a wonderful little blessing she is to our family.  We were able to celebrate last month as we finalized her adoption in court.  We couldn't be more blessed with our two girls!


And here it is, August.  She is 7 months old and I have FINALLY put the final touches on her room.  It's been a fun expression for me to make the linens and decor for both of my girls' rooms.  It was just a little hard to carve out time to get it all done this time around with not only a new baby, but an active 2 year old as well.  But I thought it high time to get busy and get it done.

I picked out fabric last December and actually sat down on January 3rd and cut out all the pieces I needed to sew her bed skirt and curtain.  She was due January 18th so I was giving myself a congratulatory pat on the back as I went to bed that night because I knew I was going to get it DONE before she was born.  Well...we got the surprise call the next morning that her birth mother was in labor and few short hours later Cora was born.  Crafting aside....we frantically packed to head to Oklahoma for who knows how long to meet our little sweetie!

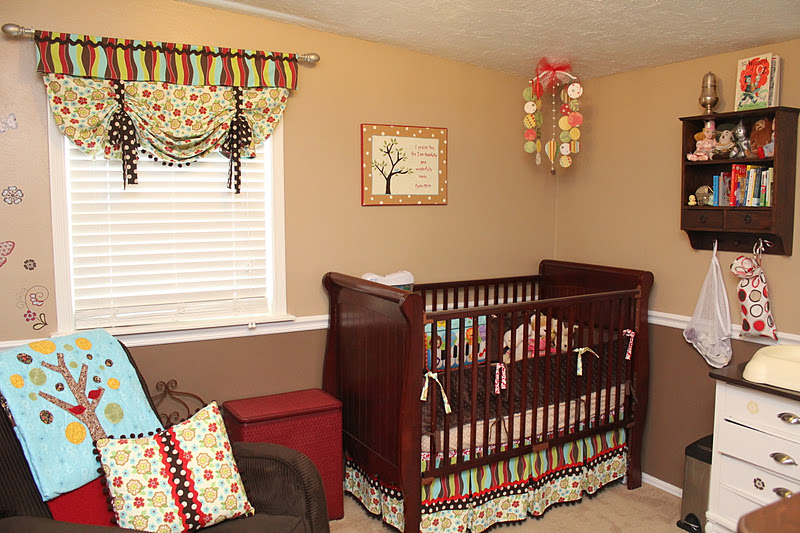
Two weeks later the four of us were back home and in down time we started to put together her room.  My wonderful and talented hubby had fortunately done some painting already while Olivia and I were gone one weekend.  He painted the awesome striped wall in her room.  At that point we didn't know whether to expect a boy or girl so we went with grey and white for the paint.  We also had a crib thanks to a friend who graciously gave us her crib.  I actually made the yarn wrapped letters while we stayed in Oklahoma for two weeks waiting for the state to tell us we could take Cora back to Texas.  Trying to take advantage of nap time while staying with friends!


We also got some special gifts made by Cora's Mimi and Nana to add to her room.  Jody's mom made her an adorable little stroller crib to match her room and my mom made the elephant wall hanging.  The bottom elephant is daddy elephant who is cradling baby Cora elephant in his trunk.  Then mama elephant in the middle and Olivia elephant on top!  They are both such special keepsakes for her to treasure forever from her grandmothers.  And both so cute!


I also had been given my great grandmother's hoosier cabinet which I decided would make a unique and interesting changing table.  It doubles as a great heirloom piece with practical functionality.  I just cute-i-fied it with some removable vinyl clings I found to match.  One of a kind changing table and storage...DONE!


So all the pieces were slowly but surely getting done and I was loving the way it was coming together.  I had the crib skirt and curtain, done some pillows and bed skirt for the day bed, some matching elephant wall art with left over fabric along with some handy Thirty-One bins for storage.


All I had left was what to do on the wall over her bed.  I thought I had found the perfect inspiration for a mobile made out of chandelier crystals and fishing line on Pinterest.  I even sat down to work on it a few times, but just wasn't feeling inspired.    Then I met a woman named Sheila Bird at a craft fair I was working who does AMAZING canvas art with quotes.  I ordered a beautiful canvas with the scripture "For this child I have prayed" imprinted on it.  Then with the gifting a little shelf from my mom and some sheers I already had, that wall started to come together.  Just the other day I found a pinterest inspiration for a new mobile (which I'll blog how I made that next).  With all those pieces in place, I had her room completed! 


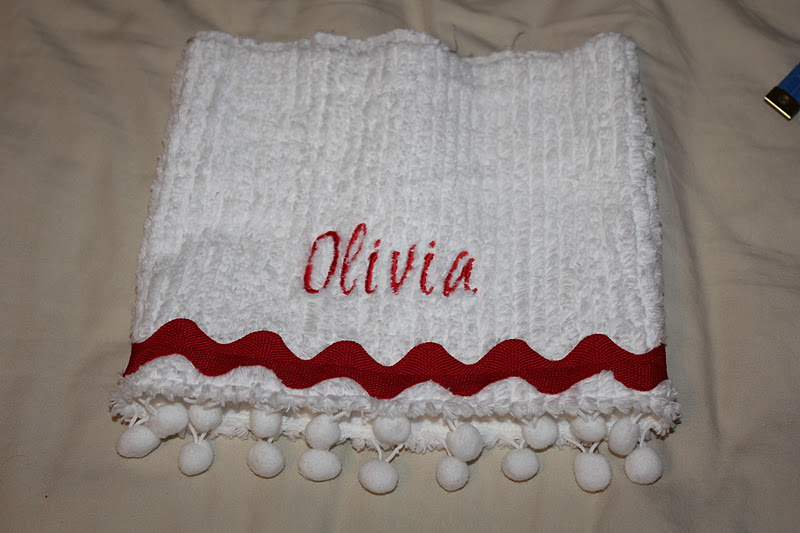
I threw the rag quilt I made for her 7 month pictures on the end of the day bed and felt tremendous relief for everything to be done!  It's taken more than 7 months, but we have a finished room now.  Hopefully it will last several years before she decided she doesn't like it!  

So our newest birdie finally has a furnished nest and I had a blast dreaming and creating it for her.  I hope some day she realizes it is an act of love.  For I do love her more than all the work or all the little bits of fabric that went into it.  And I pray in that space she dreams, schemes, laughs, and develops a wonderfully creative and exploring mind.  But most of all, I hope in that space God crafts in her a heart like Christ.  That is my best dream for her!


Tuesday, May 8, 2012

Crafting a Grateful Heart

Hello, friends!  There may be a couple of you out there who wondered if I was gone for good.  Sorry for the long delay in posts.  As I mentioned in my last post, this Mama and family have been embarking on the adventure of moving from Oklahoma to Texas.  So the crafting adventures were replaced temporarily with adventures in packing and unpacking.

The reason for our move was largely motivated by being closer to our family.  Our hearts are overflowing with gratitude for our families and the time we have already spent with them.  At the end of January my wonderful husband's fantastic parents and brother came to help us pack up boxes and load the moving van.  We are EXTREMELY GRATEFUL.  We loaded up the truck and pulled into my marvelous parents' house where they took in this family of three for a couple of months while we sold our house in Oklahoma and found a house here.  We are EXCEEDINGLY GRATEFUL.


It's now May and we are finally getting our new house in order.  It is a wonderful house that God has blessed us with here and we are AMAZINGLY GRATEFUL.  The time we have spend with family here has increased exponentially already!  We look back on our time in Oklahoma with all our wonderful friends and church family there with GRATEFUL hearts and look forward to the time we will have here with family and friends and a new church home with great expectation.  And we are GRATEFUL to GREAT GOD who loves us, guides us and blesses us far beyond what we deserve.

So what has this Mama been up to lately besides moving?  Being a mama.  I'm approaching my second Mother's Day as a mother this weekend.  It has been such a wonderful adventure for the past 14 months.  And now I'm starting to learn a little bit about how parenting can hurt.  I have recently developed what I've come to find out has been termed "Mommy Thumb."  It is a certain type of tendinitis that is at the base of the thumb joint and wrist.  It is generally caused by the motion of picking up your child...thus the nickname.  I know this is extremely insignificant in the scope of pain (physical and emotional) that parents go through in the life of a child, but it is a small example of playing through the pain and doing what it takes to care for your child.

Just because my wrist hurts, that doesn't mean I'm going to ignore my baby girl when she looks up at me and says "Up please!"  No!  I'm going to pick her up and hug that sweet baby!  And when she cries I'm going to cradle her and support her until her fear or pain goes away.  And when she looks at me and says "I Na Nu" (which is I love you in her little language), the pain of a wrist melts away.  When I think of sacrifice and love of a mother, I of course think of my sweet Mama and my loving Mother-in-Law.  But I'm also reminded of our dear sweet birth mother who chose adoption for our baby girl.  She knew she could not raise this baby,  but she made the hard and brave decision to choose parents who would love and care for her.  She did what it took and played through the pain to make that call to the adoption agency.  And we are ETERNALLY GRATEFUL.


This Mother's Day I have so many people in my life for who I am GRATEFUL.  And I know that all these blessings come down from the Father above.  So happy Mother's Day all.  I'm praying that even if it is a hard day for you for one reason or another (as I'm sure it may be for our birth mama), you can be able to look to God and find the blessings in your life that He has brought.  May He be the one to craft in you a GRATEFUL HEART.

(I am getting back to my crafting adventures so stay tuned for more posts!)

Thursday, January 12, 2012

Big New Year Adventure

Well Happy New Year Friends!  We are starting on a wonderful new year and I don't know about you, but we have kicked in 2012 with a BIG new adventure in our household.  Our family is moving back to Texas next month and January has hit with a bang.  We have loved our time here in Oklahoma.  We have a wonderful church home, we have made some life-long friends who we really consider family now, and our daughter was born here!  It has been a tremendous almost 9 years here.

I was actually reflecting on this a couple of days ago while sitting in the floor of my daughter's room playing with her.  We are packing up boxes and putting our house on the market...the house that was our daughter's first home.  While she won't remember it, Jody and I will always think of it as the home that held some of our very best memories.  Bringing her home from the hospital, so many of her big "firsts," and so much more.

Looking around her room that day was a little sad for me thinking of leaving this place, but then also a reminder of why we are moving and the wonderful things we have in store for us.  One of the main reasons we are going is to move closer to our families who are all in Texas.  And looking around that room, there are so many tokens of love made by her family who love her that we are taking with us to her new room in her new home.

I couldn't help but take some snapshots of the room so she can know what her nursery looked like when when she gets older.


I don't claim to be a decorating genius by any means, but I do love her nursery.  The curtains and bedskirt and pillow in her chair I made the week she came home with us to match an old copy of The Wizard of Oz I had found and loved.  I also painted the canvas above the crib with Psalm 139:14 before we ever met her or knew it was Olivia who would be blessing our lives.  The beautiful tree quilt draped on her chair was made for her by her Mimi.  I'm sure it will be a keepsake she will keep always!  And the bird hanging on her wall with her name and birthday was made for her by her Nana.  Just perfect for her room!

Her nursery came together piece by piece after we brought her home with love from her family!  And even though I'm a little sad to leave behind her first home, I know it is the memories that we'll always have.  I also know God has a wonderful plan in store for us as He is leading us back to Texas.  And it is such a blessing that Olivia will have the close support of her grandparents, aunts, uncles and cousins as she continues to grow into the beautiful woman God intends her to be!

Monday, December 19, 2011

Give the Girl a Hand....a Santa Hand That Is!

I wasn't sure if I would be back before Christmas Day, but here is one last blog entry for the year.  As you may or may not know, my husband and I adopted a beautiful baby girl this year and it is her first Christmas.  Her addition to the family has been such an amazing blessing.  It is really a miracle from God that she is in our lives.  She's the perfect fit that God created for us and we couldn't be more thankful.

I was wanting to make Christmas ornaments to give to our parents, siblings, cousins etc. and while browsing on Pinterest (which is one of my favorite things now, by the way) I found the perfect idea to commemorate her addition to the family.  I saw a picture of the cutest Santa ornament made out of a hand print.  So my brain went to work deciding that I could do this myself and I came up with a plan.

First - I went to check out clay at Hobby Lobby (my home away from home).  If you have never delved into the world of clay or modeling it can be a bit intimidating.  At least it was for me.  There is clay you fire, oven-dry clay, air-dry clay, self-drying clay, colored clay, modeling clay, clay you throw on a wheel and the list goes on.  For no other motivation than cost, I settled on Amaco brand Play in Clay that is a self-drying clay in color white.  I had no idea if it would work, but it was the cheapest and I thought I would give it a go.  It turned out to be the perfect medium!

I set aside a day for ornamenting and chose a time when baby girl would be in a good mood since I needed her cooperation.  I rolled out the clay (I actually ended up rolling in on a baking sheet that was lightly sprayed with cooking spray because I had some "stickage" problems when I rolled in out on the counter and it tore right through wax paper.  I'm sure that is not the professional recommended thing to do, but you go with what works, right?)  I then proceeded to press her little hand in to make prints making sure to leave a little room around each print to carve it out for the ornament.


After all the prints were done, I took a regular kitchen knife and carefully cut around each print.  You don't have to cut all the way in between the fingers.  I just followed the picture I had found on Pinterest.  I'm sure a craft knife would work for this as well.  I used small up-down cutting to prevent the clay from sticking to the knife and dragging.


I then just peeled away the excess clay.  The edges were kind of rough, but after trial and error I figure out that you could wet your finger and smooth out the edges.  I used a small knitting needle to get down in the points between the fingers and smooth them.  I then laid each cutout on a cookie sheet and used the knitting needle to make a hole at the base of each hand to attach an ornament hanger.


Even though this is an air-drying clay, every thing I read about it said it could take up to a couple of days to completely dry.  I was hoping for a faster drying time so after some research online I determined that I could place them in the oven on a low temp.  I put them in at 200 degrees for about 5 hours.  They dried like a charm! with no detectable shrinkage.

The next step was painting.  I painted each ornament with white acrylic paint all over, making sure to get down in every crease and hole completely to form a complete seal.  If the clay isn't sealed, moisture can seep in over time and soften the clay.  When that was dry I just used the internet picture as a reference.  I found that using a red paint pen for the hat and a black paint pen for the outlining was easiest.  I did use a brush for the face color.  Then I made sure to write the name and year on the back.  


After the paint was completely dry, I spray painted them with a clear, acrylic gloss seal for the final coat.  I bought a thin ribbon and used that as a hanger for the ornament.  I love this keepsake ornament and look forward to passing it on to Olivia with her other ornaments.  I will always remember her sweet little hand on her first Christmas and how thrilled I am to get to hold that hand as she grows and goes through life.


I ended up liking these so well I decided to use the idea for a dirty Santa gift exchange I had with my Waiting Moms group.  These are all families who's lives are being touched by adoption and I have the privilege of meeting with them each week.  What a wonderful support and group of prayer warriors they are!  I'm so glad to have these sweet ladies and kids in my life.


I wish you all the merriest of Christmases.  May God bless you in this season as we celebrate His Son's birth and in the coming New Year.

Erin


Thursday, December 1, 2011

It's the Most Wonderful Time of the Year

November certainly took our home by storm and I can't believe it's December already.  Two weeks ago the stomach bug had me out of commission for about 5 days.  Fortunately after that we were able to get away for eight days with family for Thanksgiving.  And we have so much for which we are thankful!  God has blessed us abundantly.

Now we roll into December and I'm excited to celebrate Christmas and get a jump on traditions with our baby girl.  It's her first Christmas and the shopping is done, but I was anxious to make some things for my girl so I thought I would share what I've been up to this week and share in some of my family traditions.

My wonderfully talented mother made all of us hand made Christmas stockings when we were little and I am always thrilled every year to see them.  They all still hang on her mantle at my parents' home, but the home made things that both she and my grandmother made for me are such a special part of my Christmas memories.  So one of the first things I wanted to get to was making Olivia her Christmas stocking.  Through the years, I've made several attempts of making stockings for myself and my husband, but have never been satisfied.  I was quite nervous about deciding what to do for Olivia.  After seeing a chenille stocking I liked at Canton and then searching the internet for ideas for finishing touches, I came up with a plan.

Thanks to the help of my mother-in-law who embroidered her name on the material over Thanksgiving, I came home ready to get crackin'!  All in all I was pleased with the outcome and home she will come to appreciate it over the years.


My mother also started a tradition with our Christmas ornaments.  Every year since 1973 when my sisters were born, she kept a journal of all the Christmas ornaments we were given and who gave them or made them as well as things we may have made for neighbors or teachers.  When we put up the tree each year we went through the journal in in order and we each hung our ornaments on the tree in that order.  I admit by the time we were in college it took so long that at times it could be a little wearying, but it is a great way to remember!  She since has divided up our ornaments but with each of our boxes she included the list.  I look forward to unwrapping my ornaments and hanging them on the tree to this day...even if it is weird to think that some of those ornaments are over 30 years old now!

To keep this tradition alive I bought an inexpensive Christmas journal at Michael's.  My sister-in-law brought her Cricut to Thanksgiving and let me play with it so I made Olivia's name and some snowflakes out of red flocked paper, ran them through my sticker machine and embellished the journal so we can start the ornament list this year.  We've already got several to include!

My other craft project for the week was to finish making her a Christmas onesie to wear throughout the Christmas season.


I do love Christmas crafts and am grateful for the time my mother and grandmother spent teaching me and crafting with me.  Those memories will always be a part of me.  But I am most grateful to my parents and grandparents for teaching me the true meaning of Christmas.  That we were sinful and separated from God so He sent His only son, Jesus to earth as a tiny baby.  And while we focus on the baby at Christmas, he grew to be a perfect, sinless man who laid down his own life to pay the penalty for my sin.  He graciously has saved me from the death and separation from God that I deserve!  That is the reason my family celebrates Christmas.  And I look forward to passing down that awesome tradition.

So if you don't hear from me before then...Merry Christmas!

Sunday, October 16, 2011

Baby Gifts Gone Handmade

Well hello again!  It's been a while since my last post, but it's been hectic around here with traveling and the usual business of life.  In my circle of friends there seems to be a lot of celebrating the arrival of new babies!  It is so exciting to watch these precious families welcome God's precious gifts come into their lives.

So with these new bundles comes a season of sweet showers and sip and see parties.  The art of gift giving has always been somewhat stressful for me.  I have always wanted to get just the perfect gift...as if that really exists.  So I have decided to branch out as of late and make some hand-crafted baby gifts for my friends.  There are so many cute "boutique" items for babies I have seen and thought, "I think I could make that!"  The latest item that came to my attention was a padded cover for a baby carrier handle.  A friend of mine from my Adoptive Moms Group got one and said she loved it.  So this was my effort in taking on this new project.

First I cut my foam to size.  Fortunately my mom had a store of foam sheets that were just perfect for this project.  You could cut your foam to any size, but I used an 8 1/2 by 10 1/2 inch piece of foam.  The 10 1/2 inch length was just right to wrap around the carrier handle and fasten.  I then cut two pieces of coordinating fabric 10" by 15".  I laid the fabric right sides together and sewed them together on three sides (the two lengths and one end).


I then turned the piece right sides out and ironed to make all the fabric and edges smooth.  I then cut a strip of sew on velcro to the length of the two shorter ends.  I pinned one side of the velcro to the sewn end of the fabric and stitched around the velcro to secure it in place.


Once the velcro was secure, I cut a strip of grograin ribbon to match the length of the same end.  I used a ribbon that was slightly wider than the velcro and cut it longer to cover the stitches from the velcro.  I flipped the fabric to the opposite side and sewed the ribbon into place even with the velcro.  (A great tip when cutting ribbon is to pass a lighter gently across the cut end of the ribbon.  The flame seals the cut end, keeps the ribbon from fraying, and provides a nice finished look to your ribbon).


I then inserted the foam piece into the open end of the fabric pocket.  (Before sewing the velcro and ribbon you may want to insert the foam and check that the fit is nice and snug inside the fabric.)  After inserting the foam, I turned the cut ends of the open fabric inside and ironed the fabric to hold it in place.  You want to make sure that the fabric goes past the foam just the width of your velcro and ribbon so that when you sew them in place, they will form a snug fit against your foam.  Once I checked the length I pinned the open ends together and pinned the velcro in place on the opposite side of the fabric from the first piece of velcro.  I then sewed the velcro to the fabric, and in the same manner as the first end, also sewed the ribbon into place.


This was the finished project.  I thought it turned out well and I was pretty proud that worked on the first try!


Once I had the pad finished I decided I needed a couple of coordinating burp cloths to welcome a sweet little baby boy at his shower today.  I had done the burp cloths before for a baby girl by taking a towel cut to size and sewing it together with a coordinating piece of fabric - right sides together and leaving a hole to turn it right-side-out.  Once turned out, I ironed it and then made another stitch slightly inside the outer edge around the cloth.  Then I simply hand-stitched the small opening I had left on the outside.  I made two burp cloths to match the pad for this particular gift (I also include pics of the ones I made for baby girl).


This was such a fun project to do...even for a person with minimal sewing skills such as myself!  I never once got frustrated (as I can often do with other sewing projects)!  So I hope if you want to take a stab at making hand made baby gifts this is helpful to you.  I'm trying to get better taking pics with each step of the process and hopefully simplify as time goes by.  Feel free to pass this along to your crafty friends and pass along any craft ideas to me!  Bye for now...